Monday 11 August 2014

[Tips] Type of Makeup Brushes

Most makeup brands sell a range of makeup brushes to compliment their makeup. Good quality makeup brushes made from high quality fibres or hair can be pricey. You can either purchase all your brushes from your favourite brand or mix and match those you prefer or to get better value. So if you don’t know your contour blender from your smudge stick, brush up your tool knowledge with my tip top guide and brush recommendations to transform you from clueless to confident...


FOUNDATION BRUSH

imageDesigned to achieve a smooth and flawless finish, the bristles are tightly packed with a tapered tip for fluid application. Dampen the brush first in warm water and firmly squeeze the excess into a towel or tissue, this will help achieve a more even distribution. You can also blend any brush strokes as you go with a damp natural or wedge sponge. Pictured: Clinique Foundation Brush


CONCEALER/CAMOUFLAGE BRUSH

imageA soft bristled, flat brush with a wider base and a pointed tip. Use to apply concealer under the eyes, to spots and to camouflage problem areas such as broken capillaries and areas of discolouration. Pictured: Clinique Concealer Brush


DUO FIBRE BRUSH

imageMade from a blend of goat and synthetic fibres this brush is ideal for buffing and blending colour. The flat, circular, feathery head provides lightweight and buildable coverage of liquid, cream or powder. Use to blend cream blush onto the apples of your cheeks or for a light dusting of shimmer powder to your cheek and brow bones. Pictured: MAC Due Fiber Face Brush


BRONZER/POWDER BRUSH

imageSoft, full and rounded, this brush can be used for both compact powder and bronzer. The bristles pick up the perfect amount of colour and distribute flawlessly onto the skin. Load your brush with the powder and shake away any excess before sweeping onto the skin. Pictured: Laura Mercier Bronzer Brush

image

MINERAL POWDER BRUSH

A thick bundled brush that can sometimes be used both wet and dry. It is expertly designed to buff mineral powder onto your skin for pure perfection. Apply in small circular motions for a faultless finish. Pictured: Elizabeth Arden Mineral Makeup Brush


FAN POWDER BRUSH

imageCreated for use with loose powder, the fine fan sweeps a light dusting of powder onto the skin for a soft, velvety effect. This application technique avoids heavy coverage which can highlight fine lines and imperfections. These brushes are also used to remove excess powder on the face, particularly after eyeshadow application. Pictured: Benefit Fantail Brush


BLUSHER BRUSH

imageMade with fine, gentle fibres the blusher brush has a rounded head which is perfect for giving a pop of colour to the apples of your cheeks. Sweep and blend along your cheekbone drawing the brush up into your hairline. Pictured: MAC Blush Brush


FACE CONTOUR BRUSH

imageSlanted and rounded in shape, the contour brush mimics the angles of your cheekbones. This is ideal for highlighting and shading with bronzer or illuminating powder. Use with cream, gel or powder to contour a sculpted finish for a defined and dramatic makeup. Pictured: MAC Face Contour Brush


EYE SHADOW BRUSH

imageLarge, flat, short and brimming with bristles for excellent coverage. The soft bristles have a bevelled edge for a smooth application without ‘dragging’ the eyelid. Use to apply all over colour. Pictured: Bobbi Brown Eyeshadow Brush


ANGLE EYE SHADOW BRUSH

image

A long, round and tapered brush perfect for shading the eye socket. Just gently follow the natural crease of the socket blending back and forth to build up depth of colour. Pictured: Laura Mercier Angled Eye Colour Brush


BLENDING EYE SHADOW BRUSH

image

Use this light brush to blend eye colours and to highlight the brow bone. Pictured: Estee Lauder Blending Shadow Brush


FINE POINT EYELINER BRUSH

imageThe extra fine tip of this brush delivers precise liquid and gel eyeliner application. A perfect line can be achieved in one stroke, or use the point to dot in between lashes for a more subtle effect. Pictured: Laura Mercier Fine Point Eyeliner Brush


FLAT EYELINER BRUSH

imageAllows eyeliner to be applied deep into the lash line for a richer and more distinct eye. Gently brush upwards to soften and blend the line for a smokey eye. Pictured: Benefit Hard Angle Brush


SMUDGER BRUSH

imageYou’re most likely to find these doubled ended with an eye pencil. The foam tip is used to soften the harsh line of the pencil giving a smouldering finish. Larger ones can also be used for applying eyeshadow such as The Body Shop's Smudger Brush.


SLANTED EYEBROW DEFINER BRUSH

imageUsed to define and fill brows for a beautifully symmetrical appearance. The bristles are stiff and angled for precise control. Apply powder, liquid or cream in short strokes mimicking the hairs, fill sparse areas, shape and elongate for a perfect brow. Pictured: Bobbi Brown Eyebrow Brush


SPIRAL EYEBROW BRUSH

imageIdeal for taming unruly hairs, the stiff bristles smooth and comb eyebrows into form. When shaping, use to brush hairs upwards and trim the excess for neatly groomed brows. Pictured: Tweezerman for Benefit Brow Shaping Brush


LIP BRUSH

imageThe sculpted tip of a lip brush is perfect for achieving a flawless line. The bristles are short and firm for controlled application. Pictured: Laura Mercier Lip Colour Brush


credit : http://www.justmakeupartists.com/articles/types-of-makeup-brushes-their-uses

[Tips] How to Take Care of Your Makeup Brushes

How-to Clean your Makeup Brushes & Take Care of Your Brushes


How-to Clean your Makeup Brushes

Start by choosing either a mild shampoo or brush cleanser. There is a slew of brush cleansers designed with makeup in mind from just about every brand that also has brushes (and some that don’t!). You can also use a mild shampoo that’s designed for human hair as well.  Either method works just as well–it depends on what you like.
Shampooing requires at least an eight hour window for drying (a little less for eye brushes, a little longer for denser, larger brushes); brush cleansers are often alcohol-based and can be used as a spot cleaner between applications or dry within minutes as opposed to hours.
If you use brush cleanser, read the instructions. I know, that sounds way too basic, and almost like a cop out, but brush cleansers vary in technique. Some brush cleansers require water, others don’t. For instance, Sephora’s Brush Shampoo works much like a shampoo and requires the same process, while on the other hand, shu uemura’s Brush Cleanser has you pour the brush cleanser into a small glass, swirl the brush in it, and then press the brushes against a towel to reshape. Often, an alcohol-based cleanser is a process that doesn’t need water and will also dry faster than cleansers that need water.  Lay flat on a towel to dry.  Always lay your brushes flat (or clothes-pin them so they hang with brushes pointed downward) to avoid water getting into the handle and ferrule (which can cause rust or deterioration of the brush).
If you use shampoo, begin by wetting the brush you want to clean with lukewarm water (never hot) and then dip in shampoo/cleanser. Brush the brush back and forth to absorb the shampoo and start to work up a lather/foam. With larger brushes (like for powder or blush), I also like to squirt a little shampoo into the center of the brush and really work up the lather. After you’ve worked the shampoo into the brush, gently run it under water and repeat the back and forth brushing motion until the water runs clean (and there are no signs of suds, either). Gently squeeze out any excess water and lay flat on a towel to dry.  Always lay your brushes flat (or clothes-pin them so they hang with brushes pointed downward) to avoid water getting into the handle and ferrule (which can cause rust or deterioration of the brush).
If your brushes are incredibly dirty or stained, try using an oil-based product, either jojoba oil or a marketed “cleansing oil” (Bobbi Brown, MAC, and shu uemura all make one). Apply a little bit to the brush, swirl and work it in, and then add a bit of lukewarm water. Swirl some more, get a little lather going, and then rinse until the water runs clean.


Once you’ve made the investment in brushes, take care of that investment by regularly washing and cleaning your brushes. Regular maintenance of your brushes will provide you with years of use, but it will also keep your makeup, brushes, and routine more sanitary. It is particularly important to regularly wash face brushes if you are acne-prone — it is best to do so after every use, especially with brushes that have been used in cream or liquids.

How-to Take Care of Your Makeup Brushes

Clean your brushes frequently to avoid bacteria or product build-up. Regular cleanings keep your brushes in better working order. Brushes used with creams or liquids (anything emollient) should be washed shortly after use, particularly if using a brush with lipstick or gloss. The stickiness of gloss can often gunk up a brush and make a real pain to get it out if you don’t clean it quickly!
Stand brushes upright or laying flat. (When they are dry!  Lay them flat when wet to dry.)  Doing this will help them retain their shape and keep bristles from splaying every which way. Keep brushes out of direct sunlight to help maintain their quality and keep them from fading.
Avoid staining your brushes by washing them immediately after using white or light colored brushes. Even though sometimes you can manage to find a way to remove or significant remove a stain later on, I’ve found the easiest way to combat staining is simply to nip it in the bud!
Always re-shape your brushes after you’ve washed them. Your brushes will dry in the shape they are left wet, so you’ll want to shape them into the shape you expect while they’re wet or damp so they’re the right shape when you go to use them the next time.
Never blow-dry or use direct sunlight to dry your brushes, as it can cause permanent damage to your brushes. If you are pressed for time, opt for an alcohol-based cleanser and spray or dampen a paper towel and then sweep the brush against the paper towel until it’s clean. Alcohol-based cleansers have a much faster drying time compared to brush cleansers or cleansing methods that require shampoos and/or water.


credit : http://www.temptalia.com/how-to-clean-your-makeup-brushes-take-care-of-your-brushes

Sunday 27 July 2014

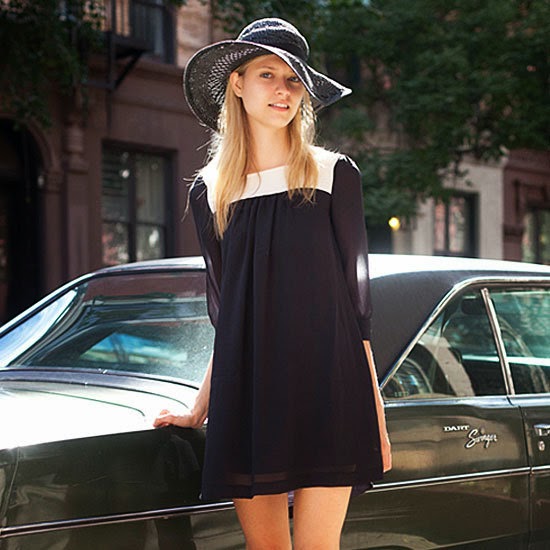
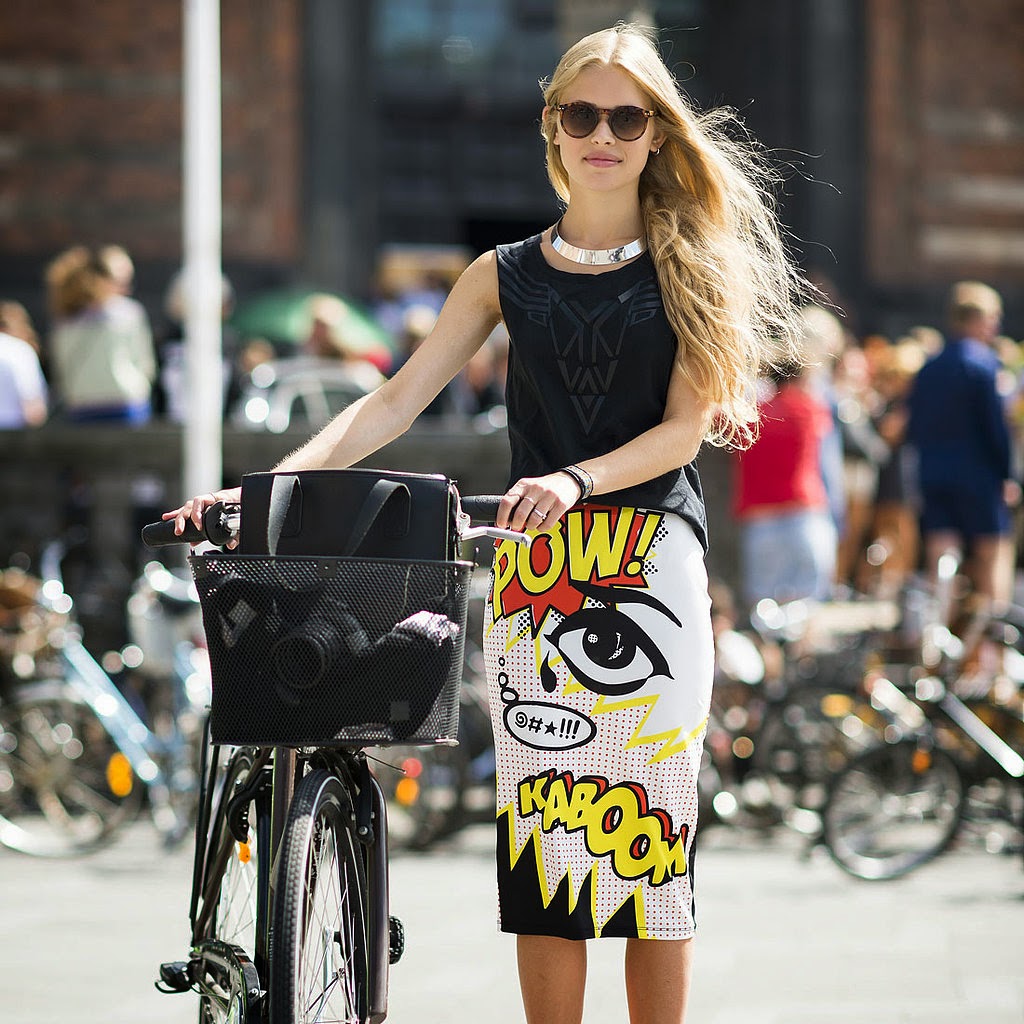
Summer Fashion Look Inspiration 2014

HELLO SWAGGER!!! Ahh summer already come >< some of you maybe are confused what i must to wear when summer? Hahaa so im gonna give a little inspiration for you girls>< 


But! If u dont like to wear a hotpants or somethin like you all already see in the photos, i'll give an inspiration too >< let see!


Dont forget to try it >< Keep stylish ♥

Tuesday 22 July 2014

[Makeup Tutorial] Sulli F(x) Red Light Inspired Makeup Tutorial

Hello Gorgeous!!
it's been a long time since my last Kpop Inspired makeup tutorial, right? who's excited? *none* OK LOL^^

Well, to be honest its kinda hard to find an inspiration.. if you guys want me to do an kpop inspired makeup weekly, please lemme know by comment down below or just directly message me for the request of which makeup that i should re-create ^^


" Eh Eh it’s a red light light~
Igeon siljesanghwang mwoga jalmotdoen geonjido molla~
Eh Eh it’s a red light light~
Gyeonggohaneun nugunga moksorireul jal deureo red light~
................ Kyeojyeosseo red light seonmyeonghan red light
Seuseuro kyeojyeo geugeoseun red light
Kyeojyeosseo red light du gaeui red light
Bulgeun taeyanggwa ne apui red light ............."


OK...
lately, i've been obsessed with F(X)'s new comeback!!! Brand new F(X) with their new concept and song.. 1st thought on my mind : HALF MAKEUP CONCEPT! OMG its so DAMN gorgeouuuuuussss !!!!!!!!!!!!
and i'm in love with Sulli's look since i saw her 1st pic teaser. Anyway, Red light is actually the new style for F(x) but they abselutely going right with this concept!! whooooooooooooooo <3 <3 <3
Love love love !!!!


Enough for the very excited introduction >< LOL
now let's move on to our main topic, which is THE MAKEUP ><
as you guys know, i already choose Sulli's look for this tutorial coz i really impressed with her in this song <3


curious how to create that look?
allright so here's the steps ..........

STEPS :
1. Dont forget to clean your face 1st before apply any makeup to make sure your face is clean :)

2. Base Makeup :
- Moisturizer (to moisturising your face) - [CNI RJ Moisturizer]
- Makeup Base / Primer/ CC cream (to make your makeup stay longer) - [Makeup Forever HD Primer]
- BB Cream / Foundation (use the 1 lighter from your skintone) - [Makeup Forever HD Foundation #Ivory]
- Concealer (sometime bb cream / foundi cannot perfectly cover up your dark circle, pimple, or unwanted mark.. so u need to use concealer to cover all of those unwanted mark only on that area. example : Under eye, side of nose, side of mouth, under the mouth and on the unwanted mark.) - [Makeup Forever Full Cover Concealer]
- Loose Powder (to set up the foundi and concealer, also make your face look natural) - [Makeup Forever HD Loose Powder]

3. Brows :
- Brow Pencil (use light/natural brown brow pencil to line the shape of your brows and the fill it in) - [Etude House Drawing Eyebrow Pencil #Dark Brown]
- Brows Mascara (sulli has the light brow hair colour, choose the brown / light brown colour) - [Etude House Color my brow mascara #Light Brown]

4. Eye Makeup :

R I G H T   S I D E
- Eye Primer (1st step before apply eyeshadow, this will make your eyeshadow colour looks pop and stay longer) - [Urban Decay Primer Potion Original]
- Warm Brown eyeshadow (as the base colour to neutralize your eyelid colour). - [Urban Decay Naked 1 Palette #Naked]
- Dark brown eyeshadow (on your crease and blend to soften the edges, also put on the under eye) - [Urban Decay Naked 1 Palette #Buck]
- Black eyeshadow (put all over the lid and blend it, and put it on the on the under eye to create the smokey look) - [Urban Decay Naked 1 Palette #Creep]
- Blending Brush (you need it to blend all the colours for the smooth gradation finish.) - [Sigma Blending Brush]
- Eyeliner (create a thick eyeliner and create a nice wings downwards the corner at the end). - [Missha Black gel eyeliner]
- Waterline (Black pencil eyeliner on the waterline to create that smokey effect). - [Etude House Styling Liner Black]
- Lash Curler (curl your lashes) - [Unbrand Lash Curler]
- Mascara (apply your fav mascara on your upper lashes also down lashes.) - [Etude House lashperm all shock cara]
- Falselashes (this is optional to strengthen your eyes) - [Glamour Falselashes no.7 (upper lashes)]
- Gray Contact (on your right eye) - [Geo softlens #IcyGray]

L E F T   S I D E
- Eyeliner (just apply very very thin line and create a natural as possible) - [Missha Black gel liner]
-  Mascara (apply your fav mascara on your upper lashes also down lashes.) - [Etude House lashperm all shock cara]
- Falselashes (this is optional to strengthen your eyes) - [Glamour Falselashes no.7 (upper lashes)]

The eye makeup details:

*sorry for the bad quality of the pic ><

5. Face and Cheeks :
- Bronzer (this is very helpful to create the illusion. to make the slim effect of your face. do contour at your face line, cheeks and also the nose. Contour Zone - Face E zone and the side of your nose) - [Benefit Hoola Bronzer and EMcosmetics Chiaroscuro stick]
- Highlight (i always put the highlighter on my cheekbones and top of the nose to create the bright and glowy effect. Highlight Zone - T zone and C zone) - [Etude House Aloha V line Highligter]
- Blush (choose the pink colour and put with circle motion at your cheeks.) - [Coastal Scents 10 Blush Palette - pink]

6. Lips :
- Lipbalm (its good to moisturize your lips before apply the lipstick. coz u dont want your lips dried quickly.) - [EOS lipbalm - Strawberry sorbet]
- Gradient Lips (apply your lip concealer 1st, go through with the pink lipstick on your inner side and blend it , finish it by apply your pink liptint on your inner side of the lips.) - [EMcosmetics the great cover up concealer, Etude House Color Pop stick Pink, Peripera Peri's tint water Purple Red]

7. Finishing :
- Wear all your fav accessories to complete this look


AND YOU ARE DONE!!!
This is my Final Look............


****

Well, How was the makeup?
i hope you enjoy this tutorial and lemme know your feedback by comment on down below, also show me your transformation makeup style!! ^.^

i hope this is can inspire you..
have a nice day!!

much LOVE <3

Saturday 19 July 2014

Boy London Tips Style

Halloo swaggy !! >< im back for a long long long....... time :"D hahhaa!

Who know about " Boy London " ? Ok if u dont know lemme tell u guys! So boy london are created by Stephane raynor , why the name is " Boy London"? Cuz she think that name will be famouse around the world ! And gotcha! Boy london are really really famous! So im the one whos really in love with this brand! Do you like it to? But u didnt know how to match it to make you more stylish and look fashionable? 
Ok! I will give you some tips >< by photo ofc ~ 

HERE YOU'RE......... 


See? How stylish they are~ So dont forget to try all of this tips that u like♥ Enjoy swagger>< 

Saturday 5 July 2014

[Info] The Power of Makeup - The Amazing Makeup Transformation

Hello gorgeous.............

Do you believe that we have the incredible power on our hand? we can create anything we want. As i told you before on the introduction part, that we have the power and also the tools (hand) to cover up any imperfection or maybe to transform into anything we want.

Makeup is ART!

YES.... wanna see how was the power of your hand with the touch of magic (your imaginations) can be something.............. that VERY AMAZING!

Here i shared with you one of my Favorite Beauty Guru that always amazed me with her magic of hand to create transformation look.


PROMISE PHAN


With over 600,000 subscribers and 100,000,000 video views, Promise Phan is a YouTube makeup sensation. Her first viral success was a makeup tutorial video for Neytiri (from the movie Avatar) back in 2010. Since then she has exploded in popularity, amassing over 100 million views on YouTube from only 74 videos. Her newfound fame has lead to various writeups and television appearances. She stands as a testament to the new generation of online celebrities who are able to single-handedly reach levels of success and fame through channels like YouTube.

The barriers to entry have eroded and people with talent, drive and a little luck now have the tools to achieve international recognition; harnessing the power of the Internet. Below is a gallery of the incredible transformations from the very talented Promise Phan. Be sure to check out here YouTube channel for more!


1. Mona Lisa


2. Lil Wayne


3. Angelina Jolie


4. Princess Jasmine


5. Pocahontas


6. Michael Jackson


7. Mystique


8. “We Can Do It!” poster of Geraldine Hoff


9. Katy Perry


10. Kim Kardashian


11. Lady Gaga Anime Photoshoot


12. Captain Jack Sparrow


13. Rihanna


14. Taylor Swift


15. Jessica Rabbit


16. Antoine Dodson


17. Nicki Minaj


18. Mulan


19. Marilyn Monroe


20. Drake


21. Neytiri


22. Avril Lavigne


23. Harry Styles


24. Princess Rapunzel


25. Aishwara Rai


26. Maleficent


27. Thinker Bell


28. Elsa Frozen


29. Twilight - Bella & Edward


30. Adelle


31. Kate Middleton


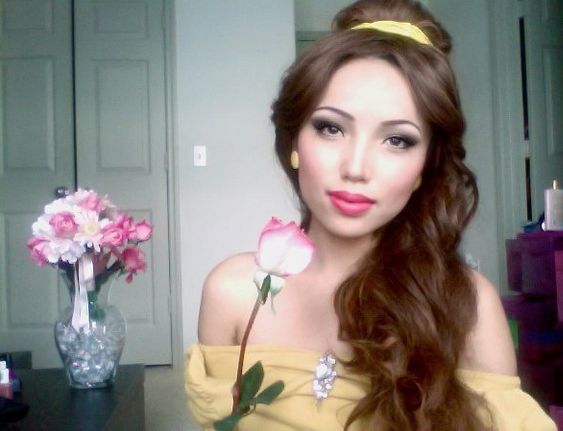
32. Princess Bella


33. Beyonce


34. Justin Bieber


35. Bruno Mars


36. Zayn Malik


37. AND MANY MOOOREEEEE !!!!!!!!!!!!!!!!!!

Check out Promise Phan on YouTube! for more info and tutorial ~

***


CREDIT : http://twistedsifter.com/2012/04/amazing-transformations-by-youtube-makeup-queen-promise-pham/