Wednesday, 23 April 2014

[Comparison] Japanese Makeup VS Korean Makeup

Hi Girls.....
Today i would like to talk about the Makeup Style of Japanese ppl and Korean ppl.

Style of make-up varies from country to country, depending on the culture, genetics, and norms.

The Japanese make-up I'm talking about here is the type of make-up you would typically see on Japanese fashion magazines like Cawaii and mina. This type of make-up can also be referred to as gyaru make-up. The term gyaru is actually just "girl" or "gal" in katakana.

From what I have deduced, Japanese make-up concentrates more on the contouring of the eye and the lashes. Japanese brows are typically arched, and are usually brown, depending on the hair color of the model. Cosmetics lenses are also common.

The image portrayed is usually a cute, bubbly, innocent, pretty girl, often achieved by baby pink cheeks and glossy pink lips. For the eyes, brown eyeliner and liquid liner is very common, as are false lower lashes. Where shadow is concerned, only a touch of brown for depth and contour is used.

Korean make-up is more towards porcelain skin, straight and thick brows, and eyeliner. I'm not saying that Japanese make-up doesn't need flawless skin, but I'm saying that the focus of Korean make-up is more so than Japanese.


So, in conclusion:


Japanese make-up (how I interpret it) :
  • contouring shadow
  • strength of eyeliner depends on type of gyaru (some are subtle, some are heavy)
  • upper and lower false lashes
  • sweet pink cheeks
  • glossy lips
  • brown, arched eyebrows
  • focuses on creating innocent, doll-like eyes


*****


Korean make-up (how I interpret it) :
  • almost no shadow
  • heavy, eye shape altering eyeliner
  • usually only upper false lashes/mascara
  • dewy complexion
  • matte nude lips
  • dark, thick, straight brows
  • focuses on creating sultry looks (most of the time)


To be honest, I don't know how to do either - I grew watching Michelle Phan, MissChievous, ete, who does what I call "Caucasian style make-up", which is more suited towards people with higher creases.

What I can do is provide some links, though.


Japanese Makeup Tutorial :


Korean Makeup Tutorial :


So, how was the Makeup? which one is suite with your style?
I hope this posts will inspire you..
GOOD LUCK!


*****


Credit : http://deathangelswake.blogspot.com/2012/03/make-up-japanese-vs-korean.html

Monday, 21 April 2014

[Trendy] Sweater Maschino Mc.Donalds

Whaat happening today in Fashion world? Yeah now, All of fashion lovers are talking about "Maschino Mc.donalds by.Jeremy Scott" , Jeremy scott he's a designer reallly famous designer from America♥ He's the one designer of ma favorite!
Im gonna talking about thats really happening , im gonna talking about the sweater only♥ REALLY LUV THIS SWEATER SO MUCH♡ U GUYS MUST HAVE THIS! MAKE U MORE STYLISH AND OF TRENDY♥♥ >\\< Jeremy why youre so so swaggy rrrhhaaa! /? 


 Have u ever seen this before? A lots of kpop and western artist wear this sweater \0/ 
                                        Paul 
                                           CL
                                         Key
Katty

So?What do u think about this sweater? 

And , do you know jeremy scott? I'll share his photo .. here ure~♥ /OMG HE'S SO SWAGGY!!

Apink's Style inspiration

Do You know about apink? Apink are girlband from Korea♥ They're ma fav girlband cuz theyre so so cute, i really love their songs and ofc their style ♥ For me, Apink's style is so simple,Casual,Girly ♥
Lets look their style >\\\< 


See?OMOO Theyre so cute ♥ They always wear a miniskirt and collab with sweater,Hoodie,Varsity or something like that♥ I really luv to wear miniskirt so my inspiration is come from A.P.I.N.K /? Haha! 
They love to wear like cotton candy color,Pink pasta and many more ♡ 


Apink's style is really2 suit me and i must say " its my style /? " I love when they wear a mini dress and they wear a sneakers / sneakers wedges ♥♥♥ 
I've never seen apink wear a higheels when they perform Hahaha 
How about u guys? Do you like apink style too? Lets try their style ♥ 

[Request] Style for "Hijabers"

HELLLLLOOOOWWW !! Im back! Hihi <3 Sorry for not updating about Fashion ♥
Todaay im gonna tell you and maybe give an inspiration for "Hijabers" who's want to look stylish and trendy with hijab :) 

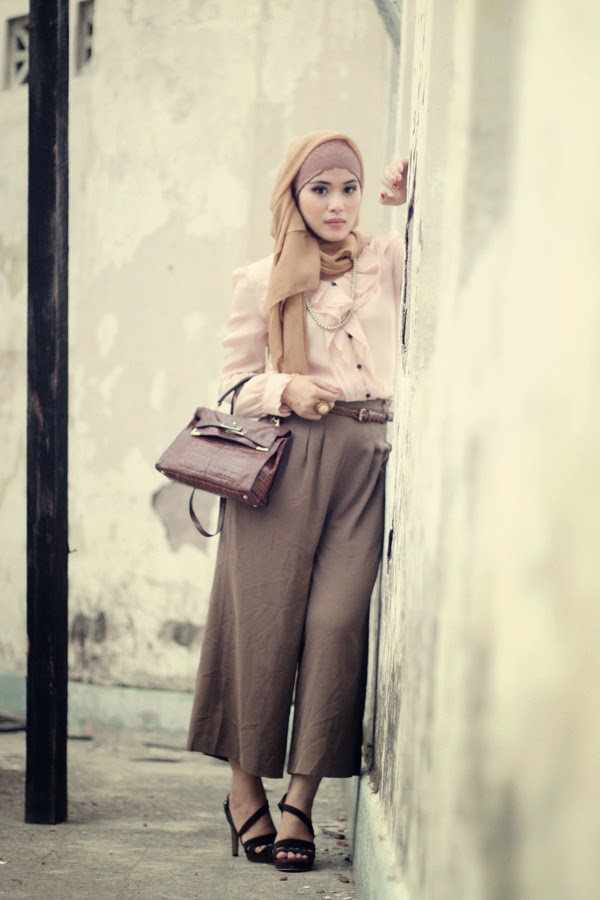
See? They're still look stylish and swaggy with hijab! I think, A lot of hijabers now really like to wear a sneakers,wedges,Boots than wear a heels and flatshoes , Cuz i think in 2014 they want look more Swaggy nat too girly ... 


And this's a little bit photos for hijabers who want look mor girly :) u can try to use a long dress with jacket,or use a long skirt with a higheels like that :)

So this's little bit inspiration for hijabers :) Keep reading and love our blog !! 
/u can request about fashion to me / 
CHUUU♥♥

Sunday, 20 April 2014

[Makeup Tutorial] Simple Gyaru Back to School

Hello gorgeous...
Happy Easter Day for all who celebrate it ^^
GBU <3

now i'm back with the makeup tutorial. ^^ who excited? *no one? lol
well, lately i had a western style makeup tutorial for you... and now i wanna give you a cute look..
inspired by the japanese makeup style (gyaru).. and i just come with the simple one ^^
and i take the theme of "Back to school"..
ppssssttt............. cute makeup can decrease your real age >< lol

1st of all, i wanna talk a lil bit about the makeup. why it called gyaru? well, actually i'm not sure but as i know that gyaru makeup is always play with falselashes and concentrate with the eyemakeup.. it always create the bigeyes effect and innocent look.. conclusion is... this makeup always inspired by the doll or anime.. 
*okay, better googling after this LOL >< 
anyway.. forget about the confusing part of the definition about that.. haha

"Back to school" makeup.. this one i inspired by the japanese comic drawings.. hmmm.. esp the girls.. and their eyes...
made me think.. how i create the big eyes and bright eyes like an anime?
dunno it will work out or not but lets try it ^^ hahaha

This is the look ^^


curious how was it done?
keep reading~

here's the steps .......................

STEPS :

1. Dont forget to clean your face 1st before apply any makeup to make sure your face is clean :)

2. Base Makeup :
- Moisturizer (to moisturising your face)
- Makeup Base / Primer (to make your makeup stay longer)
- BB Cream / Foundation (choose the right shade.. use the same tone as your skin tone or 1 lighter from your skintone)
- Concealer (sometime bb cream / foundi cannot perfectly cover up your dark circle, pimple, or unwanted mark.. so u need to use concealer to cover all of those unwanted mark only on that area. example : Under eye, side of nose, side of mouth, under the mouth and on the unwanted mark.)
- Loose Powder (to set up the foundi and concealer, also make your face look natural)

3. Brows :
- Brow Pencil (use light/natural brown brow pencil to line the shape of your brows and the fill it in)
- Brows Mascara (to set the brows nicely and natural, choose the same/similar colour like the brow pencil)

4. Eye Makeup :
- Eye Primer (1st step before apply eyeshadow, this will make your eyeshadow colour looks pop and stay longer)
- Dark brown eyeshadow (line your eye liner using this eyeshadow, also create a nice wing at the end, and then blend it into the center of ur eyelid *on your crease*. Blend it very smoothly and create a nice gradation. also apply under the eye only in outer side of the eyes.)
- Pinkish warm brown Eyeshadow (put it at the center of your lid, and blend it with the 1st colour. as goes with the under eyes.)
- Light shimmery pink/white eyeshadow (apply at the inner corner of the eye and blend it with the purple colour. as goes with the under eyes. dont forget to apply at the brow bones)
- Glitter (Use your fav makeup glitter or teardrop liner to create a sparkle and shiny effect of your eyes. apply under the eye and dap it with your finger. also put a lil on the eye corner and your lid *just a lil)
- Blending Brush (you need it to blend all the colours for the smooth gradation finish.)
- Eyeliner (create a thick eyeliner and create a nice wings downwards the corner at the end *dont create the cat eye for this look, try to create the line goes down at the corner to create the puppy eyes/ big eyes effect. for this one i use brown eyeliner.)
- Waterline (bigeyes need the white pencil eyeliner on the waterline to create that effect)
- Lash Curler (curl your lashes)
- Mascara (apply your fav waterproof mascara on your upper lashes also down lashes.)
- Falselashes (this is optional to make your eyes look more strong, and also you need the individual falselashes for the under eyeslashes)
- Crystal Sticker (just for fun and to complete this eye makeup. try to put 2 circle crystal to your under eye near the undereye lashes.)

The eye makeup details :


5. Face and Cheeks :
- Bronzer (this is very helpful to create the illusion. to make the slim effect of your face. do contour at your face line, cheeks and also the nose. *read my previous post about how to contour your face*)
- Highlight (i always put the highlighter on my cheekbones and top of the nose to create the bright and glowy effect)
- Blush (choose the bright pink/hot pink colour and put with circle motion at your cheeks.)

6. Lips :
- Lipbalm (its good to moisturize your lips before apply the lipstick. coz u dont want your lips dried quickly.)
- Gradient Lips (apply your lip concealer 1st, go through with the pink lipstick on your inner side and blend it , finish it by apply your pink liptint on your inner side of the lips.)
- Lipgloss (*this is optional* to make a shiny effect of the lips)

7. Finishing :
- Choose your best clothes/ dress and accessories to complete this look.
- Style your hair (curly/wavy/straight, its all about your choice)


AND YOU ARE DONE ^^
are you ready to back to school???? must be so excited, right?? ^^ lol

****

Soooo... this is the Final Look................
******

How was the makeup?
to be honest, i always like the cute look coz it can decrease your real age by the makeup. your face look more younger. *i guess* well, am i right?? lol

Okay guys....
i hope you enjoy this tutorial and lemme know your feedback by comment on down below, also show me your "back to school" makeup style!! ^.^

i hope this is can inspire you..
have a nice day!!

much LOVE <3

Wednesday, 26 March 2014

[Makeup Tutorial] Spring Orchid Makeup Tutorial

Hello gorgeous..
ITS SSSSPPPRIIINGGG! >.< who's excited? 
yeah.. coz this is already sring time, then i wanna give you some fresh makeup look.

now finally i'm back with the makeup tutorial. this one i concentrate on the eyes makeup.
this look is inspired by the gradation color of the flowers *yeah spring time*.
and this look will be my spring makeup ^^

How was it?
Take a look at this..


This look is inspired from the Orchid flowers. based on it colour, pink and purple.. it suits applied on your eyes at the spring time ^^

You want to know how its done? then keep reading..
here is the steps ....

STEPS :

1. Dont forget to clean your face 1st before apply any makeup to make sure your face is clean :)

2. Base Makeup :
- Moisturizer (to moisturising your face)
- Makeup Base / Primer (to make your makeup stay longer)
- BB Cream / Foundation (I mixed BB cream with Nymph Aura for more glowy effect *optional*)
- Concealer (sometime bb cream / foundi cannot perfectly cover up your dark circle, pimple, or unwanted mark.. so u need to use concealer to cover all of those unwanted mark only on that area. example : Under eye, side of nose, side of mouth, under the mouth and on the unwanted mark.)
- Loose Powder (to set up the foundi and concealer, also make your face look natural)

3. Brows :
- Brow Pencil (use light brown brows pencil to line the shape of your brows and the fill it in)
- Brows Mascara (to set the brows nicely and natural)

4. Eye Makeup :
- Eye Primer (1st step before apply eyeshadow, this will make your eyeshadow colour looks pop and stay longer)
- Black / dark brown eyeshadow (line your eye liner using this eyeshadow, also create a nice wing at the end, and then blend it into the center of ur eyelid. Blend it very smoothly and create a nice gradation. also apply under the eye only in outer side of the eyes.)
- Pinkish Purple Eyeshadow (put it at the center of your lid, and blend it with the 1st colour. as goes with the under eyes.)
- Light shimmery grey/white (apply at the inner corner of the eye and blend it with the purple colour. as goes with the under eyes. dont forget to apply at the brow bones)
- Glitter (Use your fav makeup glitter or teardrop liner to creat a sparkle effect of your eyes. apply under the eye and dap it with your finger. also put a lil on the eye corner and your lid *just a lil)
- Blending Brush (you need it to blend all the colours for the smooth gradation finish.)
- Black Eyeliner (create a thick eyeliner and create a nice up wings at the end to make a cat eye effect.)
- Lash Curler (curl your lashes)
- Mascara (apply your fav waterproof mascara on your upper lashes also down lashes.)
- Falselashes (this is optional to make your eyes look more strong, and also the under eyeslashes)

The eye makeup details : 


5. Face and Cheeks :
- Bronzer (this is very helpful to create the illusion. to make the slim effect of your face. do contour at your face line, cheeks and also the nose. *read my previous post about how to contour your face*)
- Highlight (i always put the highlighter on my cheekbones and top of the nose to create the bright and glowy effect)
- Blush (choose peach or orange colour and put with circle motion at your cheeks.)

6. Lips :
- Lipbalm (its good to moisturize your lips before apply the lipstick. coz u dont want your lips dried quickly.)
- Gradient Lips (this is sring makeup look, i want to make the lips look more fresh but still can look colourful thats why i didnt choose the same/similar colour like the eyeshadow. i choose orange colour to make the look is bloming like the flowers on the spring (?) haha.. so start with your fav lips concealer and then put your orange lipstick/liptint at the center of your lips and blend it.)
- Lipgloss (*this is optional* to make a shiny effect of the lips)

7. Finishing :
- Choose your best clothes/ dress and accessories to complete this look.
- Style your hair (curly/wavy/straight, its all about your choice)

AND NOW YOU'RE DONE!
Get Ready for your Spring time ^^

*****

and this is the FINAL LOOK .......


*****

How was the Makeup? ><
let me know about your reaction by commenting on down below and show me how's your spring makeup look! *yes! I tag everyone! hihi ^^
I hope you guys enjoy this tutorial and i'm very glad if this is can inspire you >//<

*****
***
*

Good Luck ladies.....
Have a blessed day! <3

[Makeup Tips] How to Make a Gradient Lips

Hello Ladies!
I got a lot of question about how to make a gradient lips like korean ulzzang. and here's some tips that i'll give it to you.....
You have probably seen this trend going around. It's called the gradient lips, also known as ombre or bitten lips. These lips are very popular among Korean actresses, singers as well as ulzzangs. I love it a lot since the gradient lips creates a young and innocent look. Continue with reading if you would like to see how i've created them.

.
ACTRESSES, SINGERS AS WELL AS ULZZANGS


.
HOW TO CREATE KOREAN GRADIENT LIPS? 


If you want to create these lips tomorrow, make sure to exfoliate and moisturize the day before so that your lips will be flake free and soft as baby cheeks! Right before you start with the gradient lips, apply a translucent lip balm, we are going to apply a lot of layers of product so make sure your lips are moist!

[STEP 1] Apply a nude lipstick or dap a bit of lip concealer on your lips. The nude lipstick/concealer has to match with your own skin tone. 
[STEP 2] Grab a red or pink lipstick and apply it on the inner side of your lips. You can also use a brush to apply this. I'm using the NYX lipstick - #644 Spell bound.


.
[STEP 3] Smoothen the lipstick out a bit by dapping it with your fingers. You have to be careful not to dap it on the outer edge of your lips, otherwise you will lose the gradient effect. If you've lost the gradient effect, dap a bit of lip concealer at the outer side of your lips again.
[STEP 4] Apply a milky lip tint at the inner side of your lips. You can also dap it on that area, apply more if needed. I'm using the Etude House - Fresh Cherry tint RD301. A more in depth review about this milky lip tint will be online soon.


.
[STEP 5] Apply a lip balm at the outer side of your lips to make it look moist, and we are finished! 


I've decided to create a very natural looking gradient lips, which you can easily wear every day. I hope you liked this tutorial, let me know in the comment section below if you want to see more tutorials like this in the future ^^! I'm totally in love with gradient lips at the moment ^^. It looks so innocent. What do you think about it, would you wear it?

*******


and this is another tutorial.... with different colour...

*******

Soft Pink Gradient Lips

It is a daily make-up lips
because the color is soft and not too flashy


Cherry Gradient Lips


This is a gradation lips are often done by ulzzang
in every photo ulzzang they always use a lip tint red
to make it look fresh and like a baby's lips


Milky Cherry Gradient Lips


almost the same as the tutorial cherry gradient lips
I just added a pink lipstick
in order to give the impression of an interesting, the color more pop and still cute
hahaha


Peachy Pink Gradient Lips


This is one of my favorites gradient lips
because the color is perfect on my lips hehe
I use milk pink tint
and oddly enough my milk tint color is more inclined to peach ==


Product Used :

This is a series of products that used in the tutorial...

WELL,
hope you enjoy with the tutorial: D
and GOOD LUCK!
*****


credit : http://www.memorable-days.net/2013/03/tutorial-how-to-create-korean-gradient.html
http://www.arisablog.com/2013/07/tutorial-4-way-how-i-create-ulzzang-lips.html